
Exposure Modes
They're all the same!When you first buy a DSLR, you're suddenly inundated by choices. The more sophisticated the camera, the more choices. One of the first decisions you have to make will be which exposure mode to use.
I'll tell you now, it pretty much doesn't matter as they're all the same.
I'll give you a minute to wipe off the coffee spray from your screen.
Yes, they're all the same.
Let me explain.
There are, give or take, 5 exposure modes available on most modern cameras (not metering modes, that's a whole different animal dealing with how light is measured by the camera's light meter). They are, in no particular order:
-
Program
-
Bulb
-
Aperture priority
-
Shutter priority
-
Manual with auto ISO
-
Manual
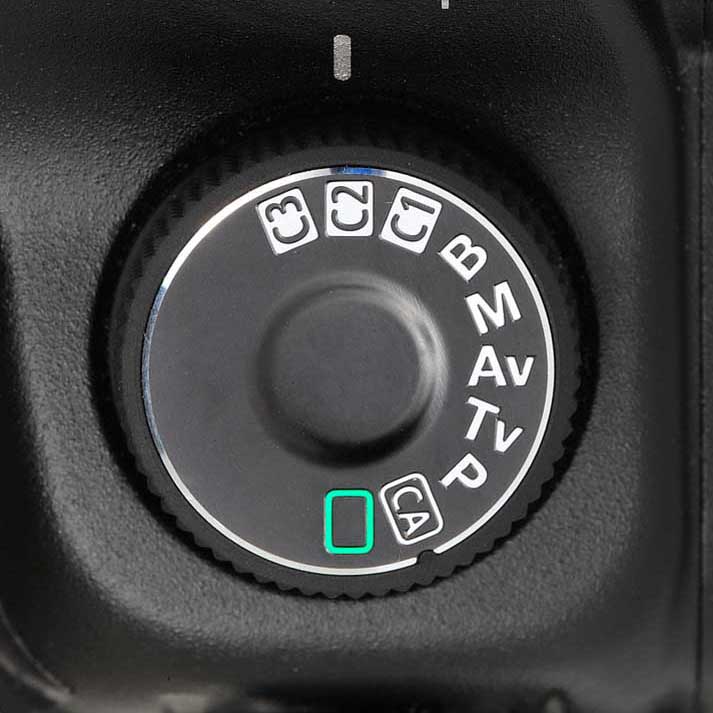

Canon & Nikon generic mode dials
Let's work through that list.
Program comes in a number of variations, such as Scene Intelligent Auto, Flexible Priority or similarly named varieties. This is where the camera makes all of the decisions for you. Aperture, shutter speed and ISO are the three variables, the "three amigos", and in this type of mode you leave it all up to the camera.
You can tilt the Program decision making a little with some cameras but essentially it's designed for beginners who just want to "take a shot" and not have to think about what's going on. Sort of like hiring a taxi in a strange city instead of driving yourself. You provide the destination (the photo) but the driver decides how you get there (the exposure).
Program is not a serious operating mode for wildlife photographers as we need much more control over our end result, so let's scratch that one.
Bulb is for long exposures, usually over 1 second in duration and often a minute or more. Not for everyday wildlife photography, more for static subjects after dusk and before dawn, so let's skip that one too.
Now we're getting into the real meat of the issue.
Aperture Priority is where you set the aperture and ISO while the camera decides which shutter speed is needed to make a "correct" exposure.
You can easily tilt the result to brighter or darker with exposure compensation, which gives you a lot of input as to how the end result looks.
Shutter Priority is similar with you choosing the shutter speed and ISO with the camera choosing the aperture to provide a "correct" exposure. That also can be tweaked using exposure compensation.
Auto ISO is where you set both the shutter speed and aperture then let the camera decide which ISO is used, again with exposure compensation available to tweak the end result.
Manual is where you set the shutter speed, aperture and ISO. The light meter is not used by the camera to set anything. Instead it's ignored by the camera and probably only used as a guide by the photographer.
1/4000 sec to freeze motion
At this point you can see a definite pattern with the first three modes. In each, you set two of the three variables with the camera setting the third. In other words, they're essentially all the same, the only difference being which option is controlled by the camera.
As photographers, which is "best"?
The answer to all questions should begin with the words, "It depends.....", because there are rarely absolutes in life. e.g. "It depends on what sort of photography you're doing".
So, the real question for us is, "which exposure mode is best for a wildlife photographer"?
As wildlife photographers, we're mostly using a long lens with a moving subject in poor light. It's our burden. That means that we want the aperture to be cranked wide open to capture as much light as possible to enable high shutter speeds to freeze subject motion at a minimum ISO to control noise.
It's a pickle
As wildlife photographers we would tend to use aperture priority, setting the aperture wide open, choosing an ISO to ensure a fast shutter speed then firing away. That way, we would always have as much light as possible entering the lens and hitting the sensor.
We would only make changes when we see that the ISO is not in the range we desire, either too slow or much higher than we think is necessary.
Or, for some reason, you may prefer shutter priority, ensuring that you have a high shutter speed to stop subject movement and letting the camera choose an aperture based on the shutter speed and ISO that you selected.
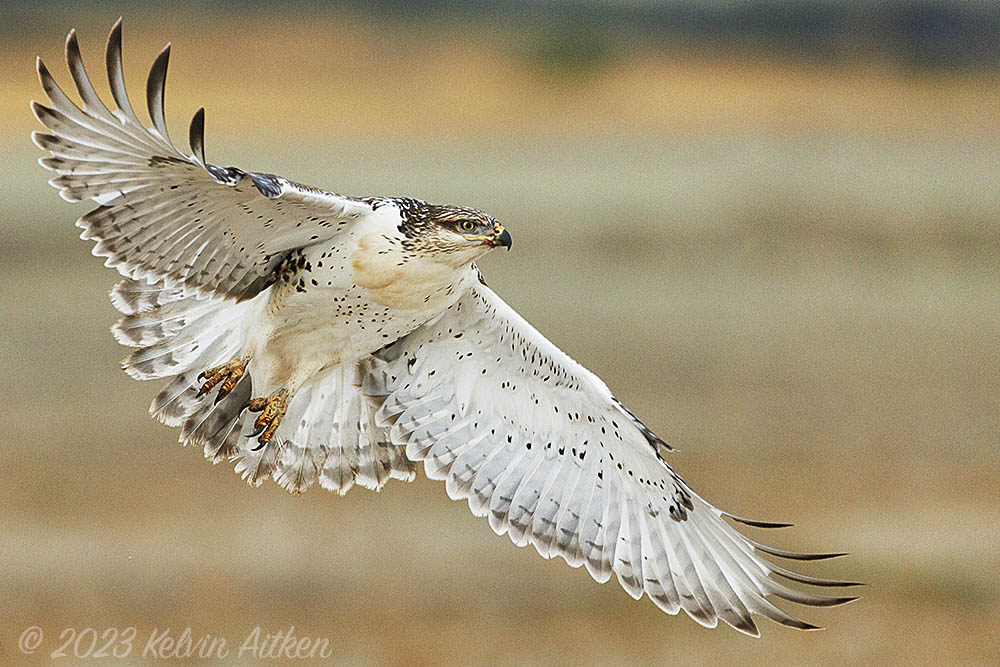
For example, you might use shutter priority if you were on a boat photographing sea birds. You need to ensure that movement is frozen with depth of field not that important. Or some other fast moving subject where freezing subject motion is a priority.
My personal preference is to use Manual with auto ISO. It's a real peach. You set the aperture and shutter speed then let the camera decide which ISO to use. Again, you can use exposure compensation to tweak the result.
Manual with auto ISO was the last of the auto functions to make an appearance in it's modern form. Not too long ago you could certainly use this mode but you had no exposure compensation. You were stuck, pretty much equivelent to Program mode. But that's changed now.
Also, not so long ago, using film above ISO 100 quickly resulted in grainy or "noisy" images. My "go to" film ISO was 64 or 50, sometimes even 40 or 25.
Then when I switched to digital, I still had to stay below 400 ISO. Images quickly fell apart with noise at 800 ISO or above.
A very noisy cat: ISO 800 on a 2004 digital camera.
Now you can shoot at 1000 to 32000 ISO or more with ease, fixing noise problems, if any, with correct exposure (slightly overexposed compared to "correct" exposure) and software manipulation in extreme cases.
So suddenly manual with auto ISO is a real option.
Then there's full Manual control, the "stick shift" of camera settings. You set the aperture, the shutter speed AND the ISO based on what's required for the exposure you want. The camera has no input, ignoring the in-built exposure meter. Correct exposure is based on how the histogram looks and/or, if using a mirrorless camera, the image in the viewfinder.
You will find that many professional photographers are adamant that manual is the only way to go for these (and other) reasons:
You have full control over your exposure.
Correct.
You have a constant exposure without the subject or background influencing the exposure.
Correct.
You get consistant results with backlit subjects.
Correct.
It's a bit daunting to try at first but you have fewer confusing variables.
Correct.
It will give you perfect exposures every time.
FALSE.
I will admit that for all my years as a commercial and wildlife photographer, using both film and digital, I pretty much ALWAYS used manual exposure, using a hand held incident light meter to get the correct exposure.
This was partly due to habit, plus the fact that, historically, auto exposures were mostly wrong and, in commercial shoots, you were often working in an environment with just flash units providing the light, or a balance of flash and ambient light. Therefore, auto exposure was useless.
In outdoor work, an incident reading always provided an exposure that was useable, something an in-camera light meter would often not provide, due to bright snow, open bright skies or extremely dark or bright subjects. Add to that the need to nail the shot 100% of the time for your client and having a +1/3 to -1/3 exposure tolerance with transparency film.
However now, with modern equipment and pure wildlife photography being my field, that's all changed.
So, how are "all exposure modes the same"? That statment still sounds dodgy.
Let's look at a real life situation.
Say you have 4 photographers, each using a different exposure mode, shooting a white egret on a river with dark spruce trees along the river bank. It's a clear blue sky with sun lighting the whole scene. The egret is sitting there, dozing. They all determine the correct exposure based on, most probably, their camera's histogram. They don't want the white bird blowing out the highlights. So each photographer chooses an exposure, the auto photographers dialing in some exposure compensation as well to ensure that the bird is not overexposed.
Question: Which exposure mode works?
Answer: All of them. It doesn't matter.
Flat, consistent light. Perfect for full manual.
Now let's throw a spanner into the works. The egret flies off. You now have the same scenario, only with movement.
"Hey", you say. "I chose shutter priority so I'm going to win in this scenario". Not really. Chances are that everyone chose settings to account for sudden movement. We're wildlife photographers after all, not whiney landscape photographers.
So at this stage all four types of exposure modes are working well. In fact, there's a good chance that everyone has the same, or similar, exposure settings, no matter in which mode they are.
But now there's a gap in the dark spruce trees in the background so there's bright blue sky behind our white bird, plus possibly some bright water with specular hightlights from the sun. The camera's light meter now sees a brighter scene, so auto settings respond to darken the now overexposed (at least to the camera) image.
The auto guys are frantically cranking away at their exposure compensation dials to bring the exposure back to "correct" or "normal".
"Hey", says the full manual exposure photographer. "I win because the light/exposure didn't change, just the overall tonal appearance. My set exposure still works. All you others lose big time as your white bird is now a dull grey."
But wait. Now the bird flies through an area that's heavily shaded by trees on the opposite river bank. The bird is now in light that's 1-2 stops darker but the sunlit background hasn't changed. The auto guys are back in business. The manual guy is frantically cranking his shutter speed or hopelessly trying to access his ISO to compensate.
In all cases, sooner or later something has to change, either the ISO, aperture or shutter speed. Those changes, in auto, are usually made using the exposure compensation dial, leaving your other settings where they are. But it still takes time, thought, decision making and some dexterity, which is no joke when wearing gloves in -40C.
While the fully manual setting works great if the light on the subject never changes (e.g. overcast day, no changing shade, constant light source) it still has to be adjusted and exposure compensated for in some way as no situation truely has consitent light levels.
For example, a critter sitting next to a tree may have the same exposure for hours. Manual works perfectly in this situation. But in the real world, when the critter drops back into the tree's shade, you will need to increase exposure because it's your main subject and now it's illuminated with less light.
When you take the full range of all scenarios, from bright light to backlight to subjects moving from full sunshine to dark shade (you know, the real world where we wildlife photographers live and breath), ALL of the exposure modes need adjustment at some stage. In fact, any auto setting will give you a BETTER result than manual in the above scenario. You'll have a useable exposure, it will have less noise and there's no fiddling.
In flat even light (e.g. overcast), once a "correct" exposure is determined, all modes work perfectly well and, dare I say it, close to identical in real world terms.
Therefore, in practical effect, they're all the same.

Any mode will work, you just need practice
So which is "best"?
None. Some are better in some circumstances, some better in others. Full manual is great with a subject in constant light levels over a long period of time. But it falls flat on its face when a fast moving Pine Marten dashes in and out of full sun to full shade, or even in flat light when the subject moves into shaded areas then back out to fully lit areas.
In manual mode, you will lose lots of images if you are in a situation with extreme swings of illumination as, even if you memorise a few settings, you still have to manually change at least one of the three variables. You won't have time to take a test shot and check the histogram when the mink chases the muskrat through changing light.
Remember, in manual mode you are, well, in manual mode. You have to physically change something when the light changes on your subject. You have to first choose which variable to change, then decide by how much you have to change, often making those descisions and adjustments before your subject moves into the new light situation.
The other three modes also work well in constant light conditions, but need constant tweaking if the background changes in tone (white snow bank to dark trees), even if the light levels stay the same.
What matters is what suits YOU and your subjects. It also matters what works best for your mind set or your "muscle memory". Switching back and forth between exposure modes can cause errors as, when the action explodes, you often don't have time to think which mode you're in. So choose something that suits your equipment and subject matter and stick to it, for most of the time.
As a wildlife photographer, I always have my lenses cranked wide open to the widest aperture. Even on sunny days, I need all the light I can get, but even more so when it's half an hour before sunrise or 20min after sunset on an overcast day.
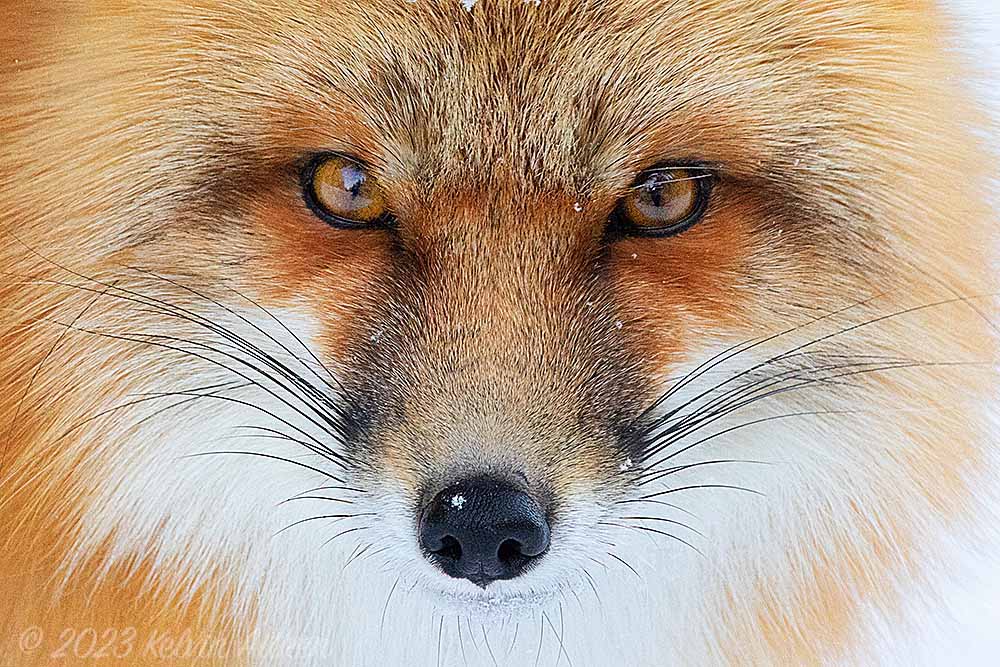
Sometimes I need to increase depth of field. A face shot of an animal can be spoiled by a big fuzzy out of focus nose or beak. I've shot animal portraits at f22 to try to pull in the nose on a long snouted fox because the end result I wanted demanded a sharp nose.
A nice pic of a snowflake, and sharp eyelashes
If you're primarily a bird photographer, you may want to be one or two stops down from fully open in order to keep the eyes, beak and feet of a small bird, that's close to your camera, all in focus or to allow for multiple birds on one shot.
But for 99% of my shots, I'm wide open. None of this "stop down a 1/3 for sharp images".
Note: If you have a top of the line lens and you need to stop down to get a sharp image, you should send the lens back. It's broken.
The same goes for teleconverters. There's a general concensus that teleconverters are "not sharp" and will degrade your image. If that's actually true for you, then, again, send it back. It's broken.
If you're using a top of the line lens with a genuine manufacturer's teleconverter you should see NO DIFFERNECE IN SHARPNESS at normal print/screen viewing distances, as long as you increase your shutter speed to allow for the longer focal length.
In case you doubt that, I give you an example. The most expensive retail lens offered by Canon for stills work is the 1200mm f8 lens. It's actually a 600mm f4 lens with a 2x extender/teleconverter built in. It's pin sharp. As expected for a lens of that focal length, you have to use a higher shutter speed to freeze subject matter. Same with any lens with a teleconverter.
So, with my lens set wide open (and I don't want to change that), I don't want to use shutter priority as it will want to change the set aperture.
On occasion I may want to use shutter priority if I'm shooting a fast moving subject where I want to be sure my shutter speed will freeze subject movement. But usually my f-stop is set wide open and I don't want it to change.
When subject movement dictates your settings
Aperture priority then becomes an option. But, for wildlife, you need to be certain that, if your subject makes a sudden move (a bird taking to flight, a fox pouncing on a vole, an elk charging you because you're too close) you need to be sure that you have a high enough shutter speed. You don't want your camera to decide that you should be using 1/60, not 1/2000.
That leaves me with full manual or manual with auto ISO.
I do use manual in some circumstances. If my subject is in constant light levels and the background is changing in tone, I don't want to fiddle around with exposure compensation. I prefer to be free to focus, mentally, on what my subject is doing. Manual exposure, once it's set, is perfect for those situations, especially if you are'nt moving around, such as in a hide or parked car.
It also works well with finely detailed silhouettes as you are dealing with a very small number of pixels which form the outline. Get that exposure right and the background can change as much as it wants, you'll always avoid blown out highlights. You don't care if the animal drops into full shade as, no matter what mode you're in, you no longer have a silhouette so no point taking a shot.
But most of the time I'm working with moving animals in varying light. So with my aperture wide open, my shutter speed set, I let the camera choose the ISO, flicking the exposure compensation dial occasionally to keep the exposure on track.
Anything up to 10,000 ISO works fine if your exposure is on point. Anything above that I need to be extra careful with exposure to make sure it's as bright as possible, which will reduce noise.
IN ALL REAL WORLD SITUATIONS you will need to change something, no matter what mode you're in. Auto or manual, you need to tweak the exposure, and sometimes make big changes. What will work best, or fastest in our case, is what you're used to using most of the time.
Don't be intimidated by those who claim to be "pros" who insist that manual exposure is the best method. It's not. It's just another option, another tool, that works well in some situations but definitely not others.
For example, manual exposure works great when backgrounds are constantly changing but the light falling on the subject is constant. e.g. A situation with steady light (cloudy day or bright sunny day) and a bird that's now sitting on the ground with a mid tone background, then next second it's in flight with a bright sky background. Manual exposure will handle that rapid background change whereas any auto setting will have the exposure quickly underexpose your subject.
But manual exposure falls flat on its face if you're using one of the very popular zoom lenses that have variable apertures, depending on the selected focal length.
Let's say you have that same bird in the same situation but you change the focal length by using the zoom function, starting at 200mm then zooming in as the bird takes off to 600mm. Suddenly you've lost 1 f-stop of light and your exposure is now garbage.
Since variable aperture zooms are tremendously popluar due to versitility, light weight and price (compared to a wide aperture prime lens) it's easy to see how someone can be fooled into thinking that "pros only use manual" and end up losing a great shot.
So remember, all exposure modes are the same, in that you ALWAYS will need to be changing one or more of your settings at some time. Pick a mode that suits you or, more importantly, the photographic situation.
A major aid for nailing the exposure is found in mirrorless cameras where the viewfinder gives you immediate feedback of any changes you make. The over-exposed egret suddenly darkens or brightens to where you want it, without having to look at a histogram or take a test shot. It's so much faster, reasonably accurate and you never take your mental focus away from the critter.
Some camera systems, such as Sony, even provide "zebras" in the viewfinder, highlighting areas that are blown out or overexposed. No need for a test shot or guessing if the bright areas are actually blowing out.
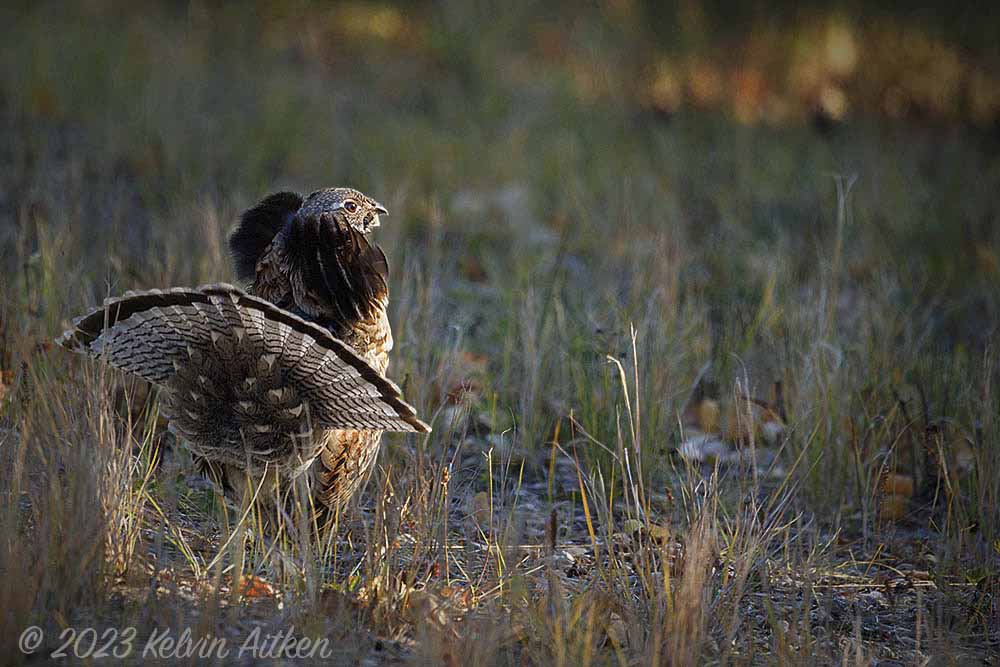
Ruffed Grouse: in and out of light patches is a challenge in any mode.
With practice and experience, you will know what settings to use as a default setup for your lens and camera. With practice and experience you will no longer hope that the photo will "come out OK". It will. Then you will be freed up for the vastly more important task of creating your art, using your intellect to craft an image to suit your intent and perceptions.
Literal and figurative bottom line: There is no "perfect" mode. Pick something that you're comfortable with and stick to it, but be flexible enough to use other modes when circumstances and logic dictate a change.